Each decal has 3 Layers:
1. The top layer is the transfer tape.
2. The middle layer is the vinyl decal. 3. The bottom layer is the backing paper.

How To Apply A Small Sticker or Decal

Step 1
Clean the area thoroughly with rubbing alcohol or soap and water. Do not use Windex or similar products because it will leave a residue behind that will prevent the sticker from adhering well.

Step 2
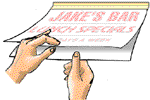
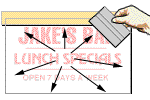
Prepare the sticker for application by firmly rubbing a squeegee or credit card across the clear transfer tape. This removes any air bubbles that may have formed and makes the sticker cling to the transfer tape.

Step 3
Peel the white paper backing off the sticker. If the sticker clings to the backing, slowly replace the paper backing and repeat Step 2.

Step 4
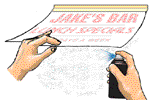
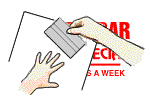
Slowly lower the sticker onto the surface and rub it in place firmly
with a squeegee or credit card.

Step 5
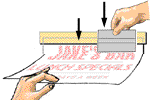
Slowly peel the clear transfer tape off at an sharp angle. Be careful not to pull the sticker off the surface. If sticker pulls away from the surface repeat Step 4.
*Use a pin to poke any air bubbles in the center and push the air out through the hole.
*For best results do not apply a sticker in extreme hot or cold temperatures.
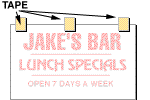
The graphic consists of
three separate pieces.
|
 |
|
|
1.
Using small tabs of masking tape, tack the graphic to the intended surface . This is to insure proper placement before the liner is removed. |
 |
|
|
2.
Apply a single horizontal strip of 2" masking tape to the top of the graphic. The strip of should be split between the graphic and the intended surface with 1" on each side (as shown). This strip will be used as a hinge that will insure the graphic does not move during the |
 |
|
|
3.
Hold the bottom edge of the hinged graphic away from the intended surface and remove the liner to reveal the sticky backing of the vinyl. Save this piece of liner for use later in the application process. |
 |
|
bbb
|
||
|
4.
To assist in proper placement, spray the intended surface with the mixture of soap and water. (This coating of water reduces the tackiness of the vinyl, letting you lift and re-place the graphic if necessary. |
 |
|
|
5.
While still holding the hinged graphic away from the intended surface. Using the squeegee and starting from the top, begin to marry the graphic to the intended surface. |
 |
|
bbb
|
||
|
6.
Once the graphic is in proper position and lying perfectly flat on the intended surface, you can now start forcing the water out from beneath the graphic. Starting from the center working outward, use firm strokes with the squeegee to force the water out from beneath the individual letters or elements contained in your graphic. |
 |
|
|
7.
After all letters and elements have had most of the water squeegeed out from beneath them, it is now time to remove the pre-mask from the graphic and reveal the final product. To remove the pre-mask without difficulty, spray with water and soap mixture and wait a minute or two for the pre-mask paper to become soggy. Gently remove the pre-mask. Be careful not to pull the graphic up with the pre-mask paper. |
 |
|
|
8.
Squeegee out any remaining water bubbles using the piece of left over liner. Lay the piece of left over liner over the graphic, with shiny side of liner facing you. Proceed to apply hard pressure to squeegee out any remaining water or air bubbles. |
 |
|

